

|
| |||
| |||
Navigation -Home -Search -News -Portal Site Account -Login -Register -Online Users Forums -General Forum -Tech Forum -News Archives -Cars Files -Overview E21 -About -Parts -Funstuff -Classifieds -Links -Projects Features -Unified -Hosting -Personal -Vin-checker -Events Registry -Index -Thumbnails |
Repairing cosmetic rustIt goes without saying that a car, being 23 years old and having had a rough life in wind and weather parked outside for several years, is bound to have rust.I decided to address the cosmetic rust myself and fix it to my best of abilities. Read on! Page 1: Repairing superficial rust.What to do with rust? The first step was to locate all rust spots on the car. There were several spots where the rust was crawling under the paint, giving it a wobbly aspect. These should be treated as well because as soon as they burst open, it's going to be worse than you first thought. I had my left front wing also completely rotten beyond repair. 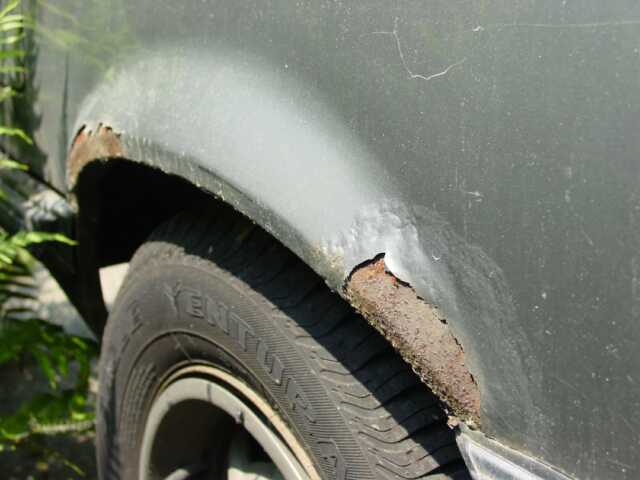
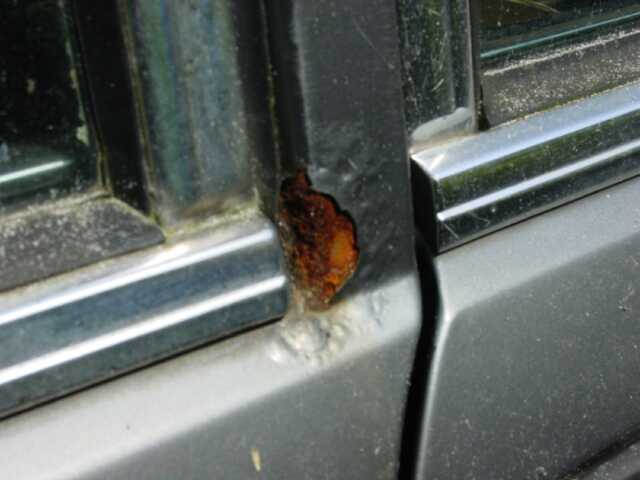
 Time to get to work The front wing would involve a little more work and would be a little trickier. So lets take a look at those rust spots first, shall we? The first thing to do is buy some sandpaper in different grades, anywhere from 200 to 600. A set of iron brushes for mounting on a power drill would be convenient as it will help do the rough work faster. You will also need a good filler paste for use on metal. First, the surface rust has to be removed. The iron brush on the drill will quickly dispose of superficial rust, but you will need to finish off the work with sandpaper manually. The idea is to get clean blank metal all around, removing the paint up to an inch or two from the rust spot to allow seamless repainting afterwards. If the rust is so bad there is a hole, then you will need to get rid of it all - even if that means enlarging the hole. You can reconstruct the shape with filler paste later for relatively small holes. Once you are looking at perfectly clean blank metal, you will have to apply filler paste multiple times to restore the shape of the removed metal. Apply the paste, let it dry for about half an hour and then sandpaper it with your finest sandpaper until it is perfectly smooth. If you are not satisfied with the reconstructed shape yet, you will have to apply paste once more and restart the sandpapering from the beginning until you get a really, really smooth surface. 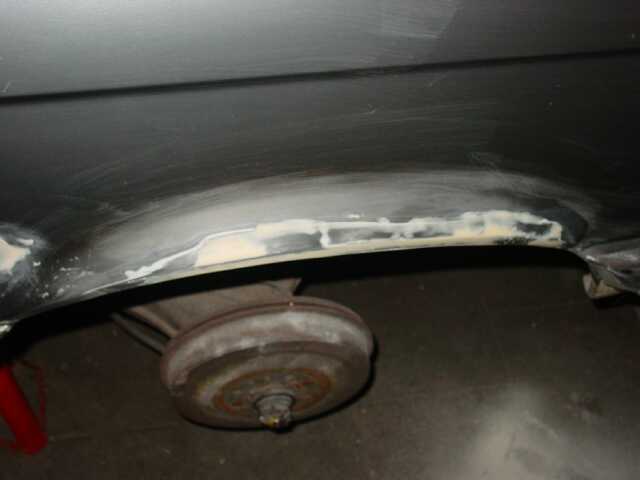
Painting For small repairs paint in a spraycan will do. If your car has a metallic color, you will need a spraycan of transparant finish as well, to achieve the shining metallic aspect. I found my paint color readily available in a spraycan in a car body shop, which was nice. You will need a spraycan of grey primer as well. You need to apply the primer as protective coating. I found my primer to be very liquid, so spray in very tiny doses to avoid the forming of paint drops, and let it dry a while before applying a new coat. When you have complete coverage, you can start with the paint. Here again, small coatings at a time is the way to go. It is preferable to apply five light coatings than two heavy ones. When done, apply a few more coatings of the transparant finish. Here is a picture of the fresly painted new wing: 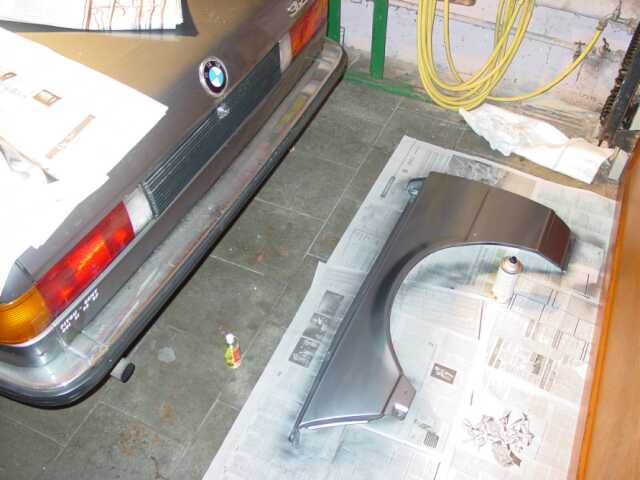
Next page |
Copyright © 2001-2005 e21.tricord.be. All rights reserved. Powered by Unified. |